Get This

Showing posts with label DotA 2 Heroes Guide. Show all posts

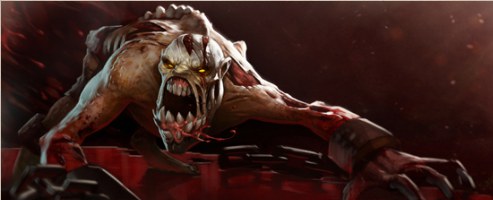
DOTA 2 Medusa the Gorgon Guide, Strategy & Builds


Medusa Background Story
Coming Soon!

Name: Medusa the Gorgon (DotA), Medusa (Dota 2)

Affiliation: The Dire
Type: Agility
Medusa Skills:-

1. Split Shot


Medusa magically splits her shot into five arrows. These arrows deal a lower percent of her normal damage. The extra targets will not receive other attack effects
(such as critical strike) and Unique Attack Modifiers.
Radius: 600
Single arrow damage: 50%/60%/70%/80%


2. Mystic Snake

A mystic snake made of energy jumps from target to target dealing damage and stealing some mana. After it reaches its last target, it jumps back to Medusa to replenish her with mana. The snake deals more damage and steals more mana per jump. Range: 800
Jump radius: 475
Base damage: 80/120/160/200


Base mana stolen: 20/30/40/50
Number of jumps: 3/4/5/6
Damage/mana increase per jump: 25%


3. Mana Shield


Creates a shield that absorbs 50% of the incoming damage by using Medusa's mana. Damage absorbed per point of mana: 0.75/1.25/1.75/2.25


4. Stone Gaze
Any enemy units staring at the Gorgon will slowly turn to stone, removing status buffs and slowing all speed properties. Deals damage to summoned units and illusions. Radius: 800
Duration: 5
Attack speed slow: 100%


Movement speed slow: Stops movement
Damage to illusions and summoned units: 500/1000/1500


Medusa Skill/Abilities Build:

Level 1-5: Mystic Snake (Level 3) and Mana Shield (Level 2)
Level 6: Ultimate – Stone Gaze
Level 6-12: Max Mystic Snake, Max Mana Shield, Stone Gaze (Level 2), take Level 2 Stat attributes.
Level 13-15: Take Split Shot (Level 3)
Level 16-25: Max Split Shot, Stats and take Stone Gaze (Level 3)

Medusa Item Build

Recommended Items:
  • Power Treads / Magic Stick / Perseverance / Ring of Basilius / Wraith Band
  • Shadowblade (Lothar’s Edge)
  • Linkin Sphere
  • Manta Style
  • Butterfly
  • Monkey King Bar
  • Buriza De Kanyon
  • Maelstorm / Mjollnr

Medusa Strategy Guide:

Early Game
Buy your items and head out to a lane. It doesn’t matter which lane that much, but be careful not to lane against heroes that can seriously disrupt early game farming. If you don’t have mana shield early game(before 6), stay back and harass passively with Mystic Snake or when enemies come forward to last hit. But with mana shield you are very tough, wear your enemies down before they wear your mana off!

Mid Game
Farm, farm, farm. Every minute is better spent farming. Cower to a tower and farm. Keep the lane to your side. Don’t ask me how to do it or don’t use a farmer! Don’t use Mystic Snake or Splitshot unless you’re intentionally pushing or going elsewhere. Do not actively go to team fights, the faster you have Manta Style the better. Once you have Manta Style however, start going to team fights while pushing when there’s none. Balance well between both. Normally your DPS is still not enough for a guaranteed victory, farm by pushing, an occasional kill in team fights and last hitting towers. Here’s where you show off your awesome team play sense!

Team Fights
Medusa deals damage much like Necrolyte and Proudmore. Necrolyte relies on Death Pulse/5 sec while Kunkka – Tidebringer/4sec. You have a 0 cooldown 0 mana Splitshot that increases your physical damage to 300% but divides it between 4 targets. For this reason I suggest turning on Splitshot at all times, you are not a good burst damage dealer nor should you try to be. Put frankly, killing/ganking is not your task. Your task is to wear them all off before they kill you one by one.

Golden rules for team fights:
  1. Positioning: always move in after your team fight initiators
  2. DPS: Splitshot on+2 illusions
  3. Survivability: Mana shield on!
  4. Surprise: A charged Magic wand saves the day


More Dota 2 Medusa updates!
Dota 2 Throne
Facebook

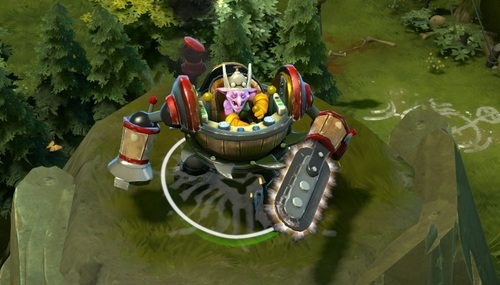
Dota 2 Timbersaw Guide, Strategy & Builds


DotA 2 Timbersaw Background Story:-
Rizzrack could still hear the screams in his mind. He worked, frantically turning wrenches, twisting screws, building and carving and forging. Sleep eluded him; he only built. Months had passed since he had shut himself in his uncle's workshop, and his deliverance was nearly complete. He rubbed his back as his eyes drifted shut, and saw a blanket of flowers floating on the placid waves of Augury Bay before exploding into a cloud of pollen that silenced lives as it seized the lungs. He woke with a choking start. For hours the rhythmic sound of a whetstone filled the shop as he sharpened a set of massive blades, his mind filled with images of strangling vines garroting neighbors, enwrapping homes. The flooding of Augury Bay had been nothing compared to the violent horrors the waters left to take root beyond the city walls. But the saw-suit would make him strong and safe he thought, allowing himself this sliver of hope before the full might of his fear crashed into his fading mind. Branches and bark and blood. When the city fell, Rizzrack fled trees that walked, and fought, and killed. Trees had shattered the gates and swarmed into the city. Trees had crushed and thrashed and stomped the last that Augury Bay could muster in defense, and stalked the few fleeing refugees. In addled silence Rizzrack unspooled the thick chain from the suit's arm, his hands quaking as he inspected each link and ran a trembling finger along the claw attached at its end. The saw-suit was ready.

Affiliation: The Dire
Type: Strength

DotA 2  Timbersaw Skills:-

Whirling Death (Hotkey: D)
Timbersaw whirls extremely sharp edges, damaging enemies and destroying trees around him in an area. If an enemy hero is affected, it loses some of its primary attribute for a short duration. Whirling Death will deal Pure damage if a tree is cut down in the process.


Damage: 100/150/200/250
Ability: No Target
Affects: Enemies
Damage Type: Magical
Primary Stat Reduction: 15%
Area of Effect: 300
Cooldown: 8
Mana cost per level: 70/80/90/100


Timberchain (Hotkey: T) Timbersaw fires a chain that embeds itself in the first tree it hits, pulling him towards it. Any enemy in the path takes damage.


Range: 800/1000/1200/1400
Damage: 100/140/180/220
Damage radius: 225
Cooldown: 4
Damage Type: Pure
Affects: Trees
Mana Cost Per Level: 60/70/80/90


Reactive Armor (Passive)
Each time Timbersaw is attacked, he gains increased health regen and armor. Each stack lasts for 16 seconds.


Stack Limit: 4/8/12/16
Stack Bonus Armor: 1
Target: Self
Ability: Passive
Stack Bonus Health Regeneration: 1 HP/sec


Chakram (Hotkey: C)
Fires your main saw blade at the target location, and once there the blade will spin, dealing damage in an area around it and slowing enemies. For each 5% of health missing, enemies caught in the saw blade move more slowly. The blade deals damage and cuts down trees in its path when fired and retracted. You lose the ability to attack and your mana gets drained while the blade is out.

Passthrough Damage: 100/140/180
Damage per Second: 50/75/100
Affects: Enemies
Cooldown 8
Mana Cost Per Level: 125/150/175
Range: 1200
Mana cost per Second: 20/25/30
Damage Type: Pure
Return Chakram sub-ability brings you back the Chakram.

Return Chakram
Returns the Chakram to Timbersaw.


Timbersaw Spell Build:

Level 1-5: Timberchain (Level 3) & Reactive Armor (Level 2)
Level 6: Ultimate – Chakram
Level 6-14: Max Whirling Death, Max Timberchain, Max Reactive Armor and take Level 2 Ultimate.
Level 15-25: Attribute Bonuses and take Level 3 Ultimate.

Timbersaw Item Build

Recommended Items:
  • Bloodstone
  • Shivas Guard
  • Pipe of Insight
  • Vanguard
  • Arcane Boots
  • Scythe of Vyse
  • Heart of Tarassque

Timbersaw Strategy Guide:

Early Game:
Ideally you’ll lane short so you have access to lots of trees and room to chase. you’ll also preferably solo, for a few reasons:
• Timbersaw’s mobility and low-cd spells make him a competent killer from the beginning, and even more so with the extra levels
• His spells themselves don’t do all that much damage individually, and their effectiveness at exploding people peaks early
• He can easily survive vs. a dual lane
• He doesn’t need that much farm, so it’s not a problem if his last-hitting is limited (and he can quickly catch up on farm with ult + whirling death spam)
Soloing a side lane: 
Do your last-hitting thing for a few levels. if you’re against another solo, try driving him off, especially if he’s melee. if you’re against a dual, you’ll probably have to play more defensively, but unless they’re going to kill you the moment you poke your head in, you can spam chain to last hit + harass like you would with e.g. powershot or something. soften up your opponents and go for a kill or double kill at 6, if you can.
In a dual lane:
You should play very aggressively vs. a solo. how you handle an opposing dual lane obviously depends on who your lane-mate is, and who you’re facing. one thing to keep in mind is, if you’re going for a killing timber chain and sense that either your target or his partner is about to stun you, wait and take the stun before chaining, so it’s not interrupted. note: when pulling, you can afford to use timber chain to finish off the more valuable of the non-golem creeps if you’re bad at last-hitting or if your lane opponents come to take them.

Mid-game:
Kill noobs. from fog, place chakram right behind an enemy hero, just touching them, then immediately chain in over them in their path of retreat. you can cast whirling death mid-chain, as soon as you’re near enough your opponent and at least one tree (if they’re by one). be sure to retract your chakram just before they’re out of its aoe, when they start to run away, so you get them with the retract damage (you can also put them between yourself and the blade to hit them with it on its return). then right click them once or twice and repeat some variation of your combo until they’re dead. obviously this is all much easier with ally help.
When playing Timbersaw, the only terrain you should see is trees. you should be looking ahead for trees whenever you’re chasing, escaping, or even just traveling. when chasing, don’t chain too far ahead of your opponent or you risk giving him a chance to change direction.
During an escape, chain over cliffs to get away, or buy time by chaining into areas that are inaccessible without destroying trees, like the area behind the ancients from the right side of the river. from there you can clear a path with your other two spells and run away, or chain over to a tree on the other side of the river, or just teleport out.
Other notable trees include those around the base cliffs, the jungle cliffs, the gap between the sentinel ancients and secret shop path, and the gap between the scourge mid and secret shop, as well as the lone tiny tree in the water by Roshan. remember to target a specific tree rather than a direction, so your hero will approach it first if you’re not near enough.
Timbersaw is absurdly good at clearing waves of creeps (gather them around you, cover with chakram, cast whirling death, collect chakram), and at tanking towers and roshan. Also be sure to use chakram for vision, such as of roshan or of the enemy barracks during a push.

Late Game:
You’re not doing as much damage anymore, comparatively. your main role now is slowing down enemies for your allies, using chakram and whatever items you may have farmed (and keeping on them with timber chain to do it). the 15% base attribute reduction part of whirling death is by this point very effective at weakening carries.

DOTA 2 Slark Guide, Strategy & Builds


DotA 2 Slark Background Story:-
Little known to the inhabitants of the dry world, Dark Reef is a sunken prison where the worst of the sea-bred are sent for crimes against their fellows. It is a razor barbed warren full of murderous slithereen, treacherous Deep Ones, sociopathic meranths. In this dim labyrinth, patrolled by eels and guarded by enormous anemones, only the vicious survive. Pitched into Dark Reef for crimes unknown, Slark spent half a lifetime without kin or kindness, trusting no one, surviving through a combination of stealth and ruthlessness, keeping his thoughts and his plans to himself. When the infamous Dark Reef Dozen plotted their ill-fated breakout, they kept their plans a perfect secret, murdering anyone who could have put the pieces together–but somehow Slark discovered their scheme and made a place for himself in it. Ten of the Dozen died in the escape attempt, and two were captured, hauled back to Dark Reef, then executed for the entertainment of their fellow inmates. But Slark, the unsung thirteenth, used the commotion as cover and slipped away, never to be caught. Now a furtive resident of the carnivorous mangrove scrub that grips the southern reach of Shadeshore, Slark remains the only successful escapee from Dark Reef.

Name: Slark the Murloc Nightcrawler (DotA), Slark (Dota 2)
Affiliation: The Dire
Type: Agility

DotA 2  Slark Skills:-


Dark Pact
After a short delay, Slark sacrifices some of his life blood, purging negative debuffs and dealing damage to enemy units around him and to himself. Slark only takes 50%% of the damage.


Mana cost per level: 55 / 50 / 45 / 40
Cooldown per level: 9.0 / 8.0 / 7.0 / 6.0
Ability: No Target
Damage: MAGICAL
Delay: 1.5
Radius: 325
Damage: 75 / 150 / 225 / 300


Pounce
Slark leaps forward, grabbing the first he connects with. That unit takes damage and is leashed to Slark, and can only move a limited distance away from Slark’s landing position.


Mana Cost Per Level: 75 / 75 / 75 / 75
Cooldown Per Level: 20.0 / 16.0 / 12.0 / 8.0
Ability: No Target
Damage: Magical
Distance: 700
Pounce Damage: 70 / 140 / 210 / 280
Leash Duration: 3.5
Leash Radius: 325


Essence Shift
Slark steals the life essence of enemies with his attacks, draining all their attributes and converting them to bonus Agility.


Cooldown Per Level: 0.4 / 0.35 / 0.3 / 0.25
Agility Gained: 3
Other atrribute loss: 1
Duration: 15 / 30 / 60 / 120


Shadow Dance (Ultimate)
Slark hides himself in a cloud of shadows, becoming invisible, gaining bonus movement speed and regeneration while not seen by enemies. Attacking, casting spells, and using items do not end Shadow Dance.


Mana Cost Per Level: 120 / 120 / 120
Cooldown: 25.0
Ability: No Target
Duration Per Level: 5.5 / 5.5 / 5.5
Bonus Movement Speed: 30% / 35% / 40%
HP Regen Per Level: 3% / 5% / 7%


Slark Spell/Abilities Build:

Level 1-5: Pounce (Level 3) & Essence Shift (Level 2)
Level 6: Ultimate – Shadow Dance
Level 6-13: Max Pounce, Max Essence Shift, Max Dark Pact and take Level 2 Ultimate.
Level 13-25: Attribute Bonuses and take Level 3 Ultimate.

Slark Item Build:

Starting of Game:
- Quelling Blade (Helps you farming creeps)
- 2x Tangoes (Helps you in lane)
- 3 Ironwood Branch (for stats)
Early Game:
- Power Treads (convert it to Strength)
- Magic Wand (If enemy team has spell casters, get it ASAP)
- Ring of Basilius (For some mana regeneration)
- Some Ironwood Branches (Branches FTW)
Mid Game:
- Mask of Madness (attack speed for more agility steal)
- Yasha (522 Movespeed 24/7)
- Cranium Basher (to chase those bastards)
- Dust of Apperance (Don’t let Windwalkers get away)
Late Game:
- Abyssal blade (for disable)
- Black King Bar (to become fearless against Blademail carriers)
- Monkey King Bar (damage is always good, gives mini bash and counters evasion)
- Heart of Tarassque
- Butterfly (For evasion and attack speed, don’t make it when enemy team has MKB)
- And other 100000000 other damage items. Just kiddin, you can make Buriza too!

DOTA 2 Spoon, the Goblin Techies Guide, Strategy & Builds

Goblin Techies Background Story
Coming Soon!


Affiliation: The Radiant
Type: Intelligence
Goblin Techies Mage Skills:-

1.
Land Mines


Plants an invisible mine that explodes when an enemy is near. The explosion deals less damage if the target is farther away. There is a max of 20 mines placed at a time. Range: 100
Radius: 200 Full damage radius/ 500 Half damage radius
Duration: Until destroyed


Full Damage: 300/400/500/600
Half Damage: 150/200/250/300


2.
Stasis Trap


Sacrifice yourself for the greater good. Deals massive area of effect damage.  
Range: 100
Radius: 200 Full Damage radius/ 500 Half Damage radius
Full Damage: 650/850/1150/1550
Half Damage: 350/400/450/500


3. Suicide Squad, Attack!

Sacrifice yourself for the greater good. Deals massive area of effect damage.  
Range: 100
Radius: 200 Full Damage radius/ 500 Half Damage radius
Full Damage: 650/850/1150/1550
Half Damage: 350/400/450/500


4. Remote Mines


Plants an invisible mine that will only activate when triggered.  
Range: 500 (700*)
Radius: 400/410/425 (410/425/425*)
Duration: 480 seconds
Damage: 300/450/600 (450/600/750*)


5. Focused Detonate


Detonates all remote mines in 700 radius around target area. Range: Global
Radius: 700
Duration: Remote Mines
Effects: Detonates all remote mines in the target area.


More Dota 2 Goblin Techies updates!
Dota 2 Throne
Facebook

DOTA 2 Dragonus, the Skywrath Mage Guide, Strategy & Builds

Skywrath Mage Background Story
Coming Soon!


Affiliation: The Radiant
Type: Agility
Skywrath Mage Skills:-

1. Arcane Bolt
The Sky Mage fires off a bolt of Arcane energy to harm his adversaries. Deals an additional 1.6× the Sky Mage's intelligence and grants 325 vision around the projectile.
Base damage: 60/80/100/120
Range: 800


2.
Concussive Shot


With Dragon-like intuition, the Skywrath Mage releases a compact ball of magical lightning at the closest visible hero within a 1600 radius. Upon impact the ball bursts slowing enemies by 40% for 4 seconds and dealing damage around the target. Range: 1600
Damage: 50/100/150/200
Slow: 40%


Slow radius: 200
Slow duration: 4


3. Ancient Seal
Dragonus draws a mystical rune on the enemy that amplifies all magical damage against them and snuffs out their ability to cast spells for a few seconds.  
Duration: 3/4/5/6
Magical damage amplification: 18/24/30/36%


4. Mystic Flare


Dragonus uses his ultimate magical ability to conjure a precise and violent mystical field that lays waste to his adversaries. Deals massive damage distributed evenly among any heroes in the area over 2 seconds. Total damage: 600/900/1200
Duration: 2
Radius: 170
Range: 1200


More Dota 2 Skywrath Mage updates!
Dota 2 Throne
Facebook

DOTA 2 Jah'rakal, the Troll Warlord Guide, Strategy & Builds

Troll Warlord Background Story:-
Coming soon
Affiliation: The Radiant
Type: Agility

Troll Warlord Skills:-

1. Berserker Rage

Allows the Warlord to use his throwing axes as melee weapons, gaining bonus damage, attack speed, movement speed, hitpoints, armor, and a chance to bash targets on attack. Berserker's Rage also changes the functionality of Whirling Axes. Bonus movement speed: 20/20/20/30
Bonus damage: 15
Bonus HP: 100
Base attack time: 1.55


2. Bash

Gives a chance that an attack will do bonus damage and stun. Stun duration: 0.8/1.2/1.6/2
Bonus damage: 20/30/40/50
Chance: 10%


Whirling Axes (ranged)
Troll hurls a fistful of five axes in a cone shape over 900 range, slowing and damaging enemy units.  
Range: 900
Damage: 75
Movement speed slow: 30%, Slow duration: 3/3.75/4.5/5.25, 
Radius of each axe: 100


Whirling Axes (melee)  
Troll unleashes a set of magical axes which whirl around him in a circle. Nearby enemies take damage and have a chance to miss on their attacks.
 Radius: 450
Damage: 125/175/225/275
Miss chance: 60%
Duration: 4/5/6/7


3. Fervor


With each continuous blow on the same target, Troll gains increased attack speed. If Troll changes targets, the stacks drop to zero.  
Maximum bonus attack speed: 40/60/80/100


4. Battle Trance


Troll's presence on the battlefield increases the attack speed of himself and all allied heroes.  
Radius: Global
Duration: 10
Bonus attack speed: 60/120/180


Stay tune for more Dota 2 Jah'rakal, the Troll Warlord updates!
Dota 2 Throne
Facebook

DOTA 2 Brad, the Centaur Warchief Guide, Strategy & Builds

Centaur Warchief Background Story:-
Coming soon

Affiliation: The Dire
Type: Strength

Centaur Warchief  Skills:-
1. Hoof Stomp

Slams the ground, stunning and damaging nearby enemy units.
Radius: 315
Stun Duration: 2/2.25/2.5/2.75
Damage: 100/150/200/250


2. Double Edge

Centaur strikes a mighty blow at melee range, damaging both himself and the target. Centaur cannot die from Double Edge. Double Edge deals its damage in a 190 AoE around the target.  
Range: 150
Radius: 190
Damage: 175/250/325/400


3. Return

Centaur Warchief immediately counters every attack, damaging the attacker based on a percentage of Centaur's strength.  
Base Damage: 16/18/20/22
Bonus Damage as Percent of Centaur Warchief's Strength: 26%/34%/42%/50%


4. Great Fortitude

Centaur Warchief passively gains large amounts of strength.  
Bonus Strength: 15/30/45


Stay tune for more Dota 2 Brad, the Centaur Warchief updates!
Dota 2 Throne
Facebook

DOTA 2 Magnus the Magnataur Guide, Strategy & Builds


Magnataur Background Story:-
The master-smiths of Mt. Joerlak agree on only a single point: that the horn of a magnoceros is more precious than any alloy. And of all such horns, the largest and sharpest belongs to the beast they call Magnus. For half a generation, Magnus took easy sport goring hunters come to claim the treasures of his kin. Each time he would return to his cave with hooves and horns stained red, until his Matriarch urged him and all their kin to seek refuge to the north beyond the shadow of the mountain. But Magnus scoffed, having never failed to defend his people. The magnoceri would stay, he decided, for a magnoceros does not believe in chance... nor does it ever change its mind. But when Mt. Joerlak erupted without warning, and half his kin perished in the fire and ash, Magnus changed his mind after all. The survivors pushed north, until they reached a blockade watched over by a hundred hunters armed with bow and steel. Magnus expected no less. He led his fiercest brothers and sisters in a charge against their enemies, and fought with a ferocity matched only by the fire-spewing mountain at his back. Meanwhile the magnoceros elders, mothers, and calves vanished into the drifts. The master-smiths are divided about what happened next. Some say Magnus reunited with his kin, while others claim he suffered mortal injuries and expired alongside the body of his Matriarch. Neither theory is correct. Magnus did vow to rejoin his kin...but only after seeking out those responsible for the eruption of Mt. Joerlak and watching them die upon his horn, for a magnoceros does not believe in chance.

Affiliation: The Dire
Type: Strength

Magnataur Skills:-

1. Shockwave

Magnus sends out a wave of force, damaging enemy units in a line.
Range: 500
Radius: 150 (Starting radius) / 700 (Distance) / 150 (Final radius)
Damage: 75/150/225/300
11/10/9/8   90 Mana


2. Empower

Gives an allied unit bonus damage and cleave on attack.
Range: 800
Duration: 40
Bonus damage and cleave: 20%/30%/40%/50%
Cooldown 12
Mana 40


3. Skewer

Magnus rushes forward up to 800 distance, goring enemy units on his massive tusks. Units hit on the way will be dragged to the destination, then damaged and slowed.
Range: 800
Radius: 95


Damage: 70/140/210/280
Maximum number of targets: 1/2/3/4
Cooldown 30
Mana 80


4. Reverse Polarity


Magnus changes properties of matter, sucking all nearby enemies in front of him and stunning them with a powerful slam and dealing damage.
Radius: 410
Stun duration on heroes: 2.5/3.25/4
Stun duration on creeps: 3/4/5
Damage: 150/225/300
Cooldown 120/110/100
Mana 200/250/300


Stay tune for more Dota 2 Magnus the Magnataur updates!
Dota 2 Throne
Facebook